how to use this cd rom
 
The Buttons

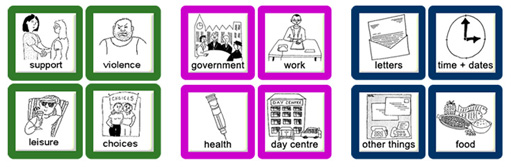
On the left side of the screen you see four buttons which help you navigate through the CHANGE Picture Bank CD ROM.

                            
Back       Press to get to the last page you viewed.
   
Help  Press to see the contents of the help section.
   
Start Press to get to the very first page of this CD ROM and the Licence Agreement.
   
Choose Big pictures or Small pictures Press to switch back and forth between big PRINT (high res) pictures and small print (low res) pictures.
   
 
On this CD ROM are 100’s of CHANGE pictures.
They are divided into three categories:
PeoplePlacesThings


Each of these categories is divided again into
sub-categories.

Each of these categories is divided again into sub-categories.


The CD ROM contains two versions of each picture, a big PRINT (high res) version and a small print (low res) version. The CD ROM contains two versions of each picture
   
This button means big PRINT (high res) pictures This button means big PRINT (high res) pictures.
   
This button means small print (low res) pictures
This button means small print (low res) pictures.
   
If you see this button it means you are looking at big PRINT (high res) pictures

If you see this button it means you are looking at big PRINT (high res) pictures.

Click to switch to small print (low res) pictures!


If you see this button it means you are looking at small print (low res) pictures

If you see this button it means you are looking at small print (low res) pictures.

Click to switch to big PRINT (high res) pictures!

 
Once you have chosen a category and a sub-category all the pictures in that category will appear on the screen.

Once you have chosen a category and a sub-category all the pictures in that category will appear on the screen.

In some cases there are so many, that you have to scroll the page down to see them all or even switch to the next page.


Make sure you see all the pictures in the category by looking through the different pages!
 
How do I put pictures inmy own documents?


Quick and easy:

- Open the document on which you want to work or create a new one in your word processing programme.

On the CD ROM, click the picture you have chosen and drag it into your document.

- On the CD ROM, click the picture you have chosen and drag it into your document.

 
More flexible and creative:

- Follow the steps in

Then click on your image.

- Then click on your image.


Choose Format from the menu bar then choose Picture from the drop down menu.

- Choose Format from the menu bar then choose Picture from the drop down menu.


Choose Layout then choose In front of text from the options. Then click OK.

- Choose Layout then choose In front of text from the options. Then click OK.


Now you can click and drag the picture to a new position anywhere you like on the page.

- Now you can click and drag the picture to a new position anywhere you like on the page.


You can also choose Square from the Layout options.

- You can also choose Square from the Layout options.


Now your text will go around your picture.

- Now your text will go around your picture.


Try reading the section


If you need more information about computers and the technical side of the CD ROM try reading the section “The CD ROM – Getting started” in the book.


Back Next